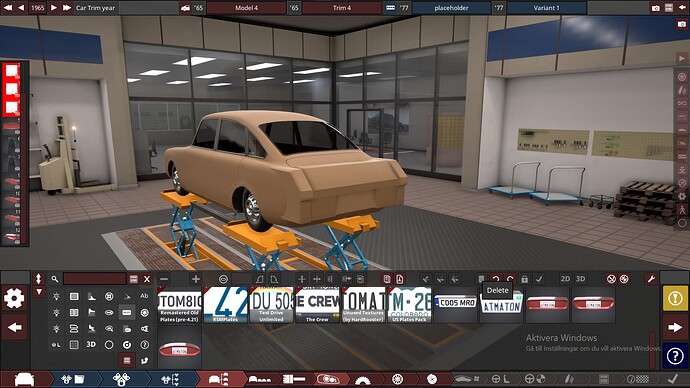
That’s close enough for me. Here’s hoping the next one lives up to the lofty standards of this not-quite P6.
You could maybe also use this older body for it as well.
But I think either way you may have your work cut out for you on this one. The Landcrab is a pretty distinctive design that Automation doesn’t really have a proper body for.
Either way, it’s not going to be fun… ![]()
That body you’re showing, I did an attempt but…the roofline is rather impossible to even get somewhat close in that case. If I try to take away the most swooping fastback shape from it, it only ends up looking like a Standard Vanguard or 40s Plymouth or something…way too old fashioned to resemble a Landcrab.
The Cortina body ain’t that bad, except for the rear…I really can’t understand why it doesn’t have morphs to take away the Cortina look from it. I mean…nothing on the Cortina is as distinctive as its tail, meaning that no matter what you build on it, it is going to look like a Cortina. ![]() And since the body is curved more or less in every direction, reshaping it is by no means a walk in the park…
And since the body is curved more or less in every direction, reshaping it is by no means a walk in the park…
Unfortunately I am more or less stuck with that body it seems like so I have to find a way…
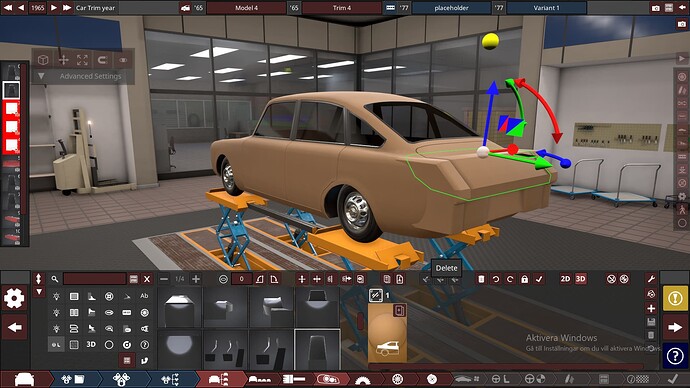
One thing has been bugging me the whole day - somewhere there is an Automation fixture that has the same shape as the BMC 1800 trunk! After some thinking, I came to the conclusion that it is probably this centre armrest from the modular 80s interior tab. And well…I guess I was right.
Now, this will by no means look perfect, I have fused this together on the body where it was possible, more or less, without getting any edges poking out, or gaping holes. Hopefully, you will still be able to identify it as a BMC 1800 even if it will look a bit off.
Also, it is hard to do much about the Cortina having traditional RWD proportions while the BMC 1800 took FWD proportions to the extreme. This will also make the overhangs even longer, and yes, I agree that it will be a bit “off” on a car that basically was a Mini on steroids, but it is what it is… As Maverick says, there simply is no good body for the BMC 1800 and my skills aren’t at “3D the whole body” at this point…
In case you don’t know what the tail of a BMC 1800 looks like…
…so the car you’re going to see WILL look weird, but so did the original.
So, I think this is about as close as one will get, and I admit that it looks really weird now, but I have tested with some mockup taillights, bumper and license plate, and it suddenly looked much better…no, much closer to the original, because nothing can make this weirdness of a car look good, but still.
As shown earlier, this arm rest fixture was used to reshape the trunklid, and in narrowed form, the fender tops.
These rounded-corner-3d-thingies, whatever you call them, gave the fender tops a more rounded off look, and also, raised them a bit over the trunk lid, just like on the IRL car. Yes, it is not really accurate, but then again, I think it is hard to pull off that…
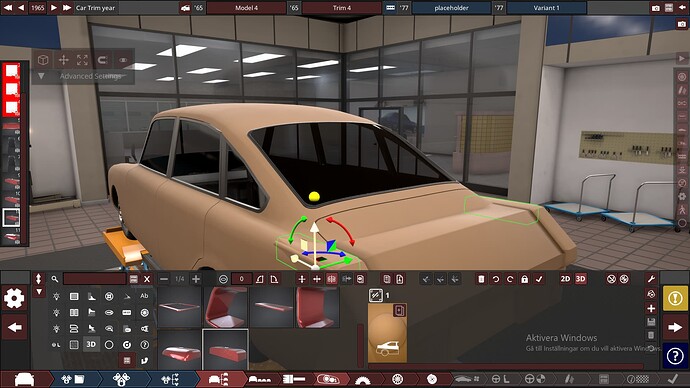
The lower portion of the rear end is just more of the same, stretched and rotated differently. Yes, it looks extremely square now, but taillights and bumper takes away from that a bit. The plate recess is…just a plate recess that is 3D:ed in.
And as said earlier, I’ll be happy to take some tips and also feedback if you have some to give, so. But even if this isn’t the most accurate stuff, it is still closer to the truth than the Cortina-esque tail, and to be completely honest, I thought it would take days to come up with a working solution…
Sorry for an off-topic interruption, but… the pic of the car you’ve used shows that some mad lad had that Bri’ish weirdness in Poland around 20 years ago already, maybe before we even were in the EU. Seeing as it’s LHD, I wonder if it somehow had Polish history (how?!), or someone was crazy enough to import specifically a derpy BL product as a classic… lol. How I know that? Those yellow (historic) plates with the flag were issued in 2000-2006.
Back on topic, I think the basic shape you’ve used is pretty good, although IMO you could raise it a little, to not have the boot lid form 4 planes instead of 3 as much (although I realise that would require fiddling with the rear quarter panel shape).
I would have liked to do that, and also, I tried, but it made it look like if there was tailfins on the car (which really is what I have tried to remove, LOL). I guess the problem is that the 1800 really is a notchback and not a fastback, but still with an almost fastback shaped roof. Also, the sides of the 1800 is very flat compared to the Cortina ones. So, this will probably be the worst compromise of them all (well, I sort of fear Renault 16, NSU Ro80 and to some extent Peugeot 504 too…then we’ll enter the “all cars looks the same nowadays” era and it will probably be easier…).
It could have belonged to the British embassy?
Hmm, maybe? Sure sounds logical.

Wheels are important to get the right feeling, as I said, and while I didn’t find some exact replicas, those from one of @Aruna s brilliant wheel packs did the trick. The slots are a little too square, should be more rectangular, but otherwise…
My way of trying to recreate the subtle little ridge the sides have. Best one? No idea, but I feel like you have to play some tricks with the eyes to get a similarily subtle one.
Also, a little ridge on the sills too. On the real car, it follows the lip of the arches pretty well, but pulling out the arches on this body makes them a bit too “round” so I toned that down a bit. Hence not looking 100% right in this area.
The 1800 has a small hood scoop, and I started with this as a base…
Then 3Ded in the top part.
As usual, almost forgot the rain gutters, but the devil is in the detail.
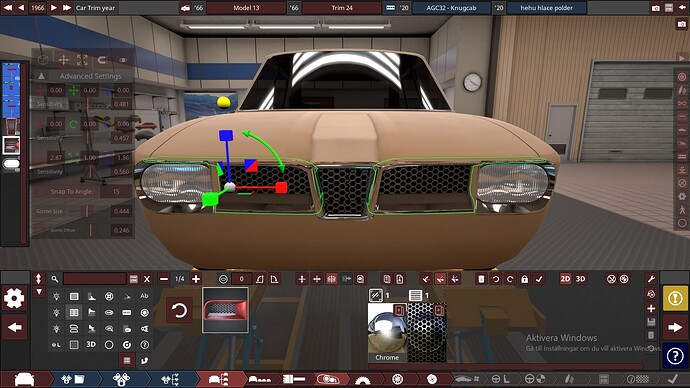
A relatively simple grille fixture should work for this.
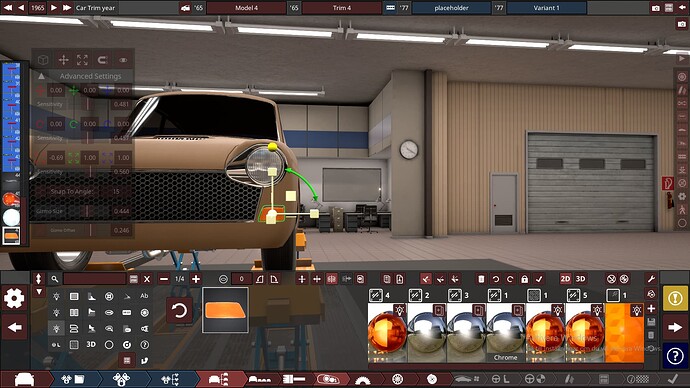
The best headlamp trim rings is this turn signal fixture, but with everything except the trim turned transparent.
Then I 3Ded in a regular round headlamp to get it at the depth I wanted it.
Turn signals feels rather straightforward too.
The standard grille mesh lacks a bit of depth and realism, and also does not look much like the real thing, so I did like on the Rover - transparent mesh and a radiator 3D:ed in.
Then making a new mesh with some…eh, extreme resizing.
And some grille trim like the real thing
Often, this mod bumper pack works well on 60s cars, and this is such a cause.
Added some molding to take away the roundness of the hood, it is rather flat up front on the original.
Seriously impressive stuff here.
[Aktivera Windows]
Thanks!
That was a pretty good idea with using that indicator for the headlight trim.
This turn signal fixture had more or less the right shape for the grille badge. Now when we’re at it, I will give beginners a little tip. When I was new at this game, I often was afraid to use stuff for what it was not supposed to be, thinking that I would probably be laughing stock for that. It’s really the opposite, though. Look for the right shapes, and then if it means using a bumper bar as a door handle, a tail light as a hood bulge - well, that’s all good. See the fixture type as more or less a suggestion, and you will have a greater possibility to end up with cars having their own personality instead of just looking like a mainstream Automation build.
This bumper fixture in 3D form is good for horns in many cases, so also this one.
Side detailing is rather straightforward. Mirrors in this era was often accessories, the car came without them and you had to have the dealer install them for you, or get them yourself, probably also here since I really see 1800s with many different types when I look. Most common seems to be a rather square chrome fender mirror, so that was what I went for. A little side marker, and the Beetle (?) door handle fixture isn’t 100% the right type, but close enough so it works IMO.
No fuel filler door is close enough, so I ended up with using a popup headlight fixture. Still not perfect, but nothing on this car will be.
Well, with the very much extended trunk, it is nice that 3D bumpers with some curvature exists nowadays.
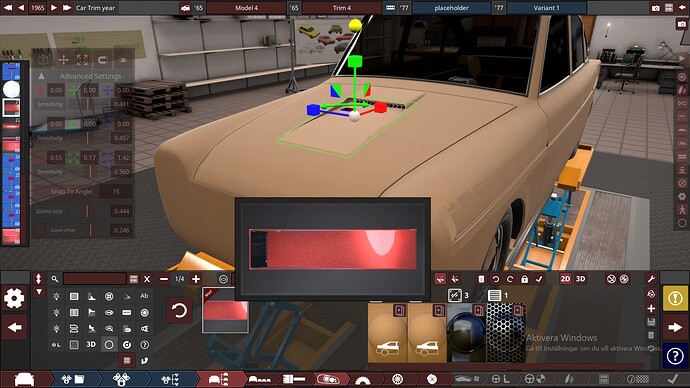
And this taillight fixture, 3D:ed and stretched depth wise, once again, “close enough for a less than perfect build”.
Also, the little edge over the rear window adds some depth and personality so I tried adding something similar.
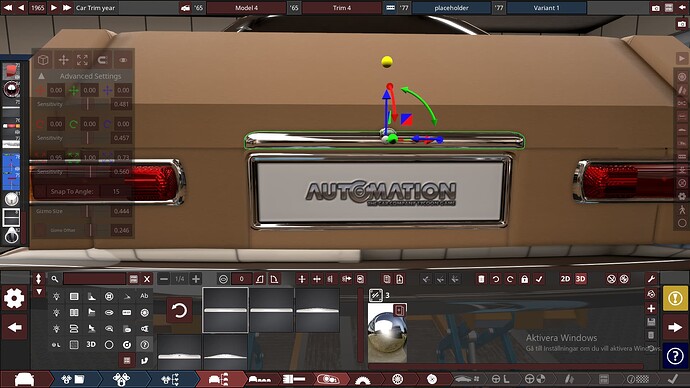
The “radiator accent” fixtures are often great for trunk handles on old cars, and I used the “key button” fixture to finish it all off.
I noticed a gap under the trunk lid so I filled it up with this L-shaped bumper fixture. Finally it was good for something.
A bit funny when the fixtures sort of outlines what the car is going to be
So, now I felt kind of finished with the exterior, time for paint. I kind of wanted red, but I can’t find many pictures of red Mk1 1800s so I am not sure if that colour was available. Most of them seems to be white, but white does not photograph all that well in Automation IMO. So, I went for the cyan-blue-ish shade from one of the reference cars, suits the car somehow and feels prober 60s.
Is it flawed? Yes, in a lot of places. Can you identify it as an 1800? Well, IMO, yes. With the limitations of the game taken into consideration I am satisfied with this since I wasn’t even sure I would be able to pull one off…
Now it is time to tackle the interior I guess…
For a more minimalist dashboard than in the Landcrab, I guess you have to look at a first gen Fiat Panda, making it should be a walk in the park.
Some rather heavy curvature on the Cortina body though, so a dash filler was necessary, not always a fan of how they look, but…
Then two more of them as top and bottom of the dash.
Not a huge assortment of 60s horizontal gauge clusters available, so once again I went for the Peugeot one even if it is not all that similar.
Then I filled out the middle with “door panel” fixtures.
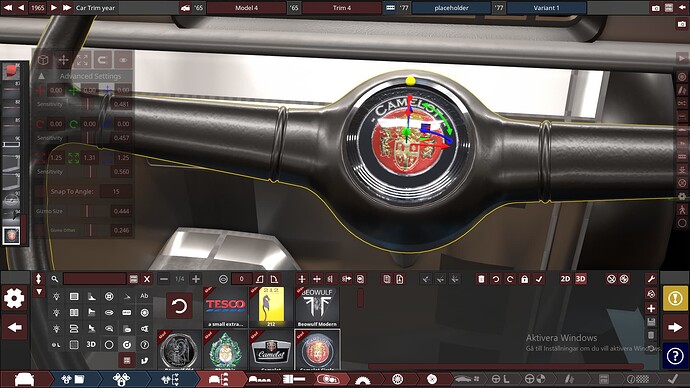
The steering wheel is a rather simple two spoke affair which I found a pretty similar one among one of the 50s/60s interior packs. Important to remember that the Landcrab had an awkward steering wheel angle it shared with the Mini (where it was more necessary) and got some heavy criticism for.
A pretty similar steering wheel badge, a bit less simplistic than in the Landcrab, but as I at least want to remember the steering wheel badge in the 1962 Austin A60 I had to look a bit more like this, I guess it is still heavily BMC inspired.
Yet another dash filler used for the under dash parcel shelf. Switches are all from the 50s/60s interior packs.
Seems like blue cars have had grey interior, so that’s what I went for when I started with the carpets.
I don’t know if the 1800 had genuine leather or just very convincing imitation, but it would not be out of the question for a slightly upmarket british car (my A60 had it and was a notch below in the BMC model lineup), so I went for that.
Always a struggle to match front and rear seats, so well, that became a compromise. The rear seat are actually mirrored front seat fixtures in this case.
I see wood trim on top of the door cards in all reference pictures I can find, so I guess that may be standard equipment.
While the actual door cards are very plain, not unusual in old British cars, so I went for the smooth ones.
Didn’t find any reference pictures of the parcel shelf, but I guess that one might be pretty generic and went for that.
The 1949 Mercury exterior handles are often useful for interior handles in older cars.
Window crank is just a vanilla one, and the door pockets a 3Ded in hood scoop - as I said, don’t be afraid to use fixtures in creative ways, see the categories of more as a “suggestion” than anything else.
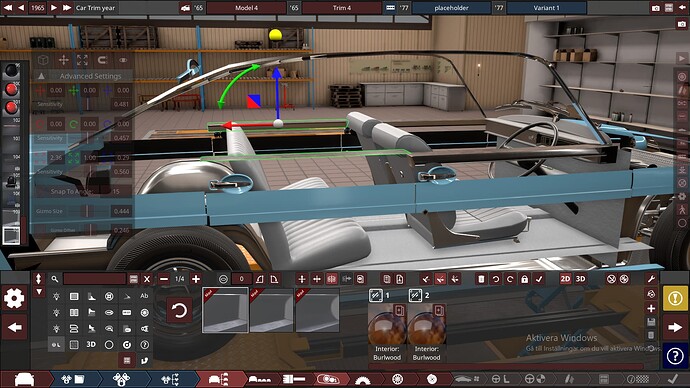
Some bodies are impossible to put pillars and headliner into but I could still get an OK result here.
Well… I think we have a finished Landcrab now? Did some tweaking of the exterior, like raising the suspension and moving the turn signals a bit upwards.
It was hard to pull off, and I didn’t manage to do it the whole way, but at least I did it.
Now on to the Renault 16 where I have found out that the hatchback version of the BMW body was surprisingly close…
OK, time for the first french car to win, the 1966 Renault 16.
A bit surprised that the BMW body was pretty close, but…to me this is pretty much a R16.
There is not much advanced sculpting on the R16, but this recess in the hood is.
This served as the middle part of the recess.
While I surrounded it with this fixture. I must say that I have just recently started to explore what you can do with this molding pack, other than just simple ridges and recesses, so my work may seem amateur-ish, I’ll gladly take tips here.
This vent became a good centre portion of the grille.
While this vent was good for the outer parts. Yes, a bit deep but this grille will probably need a new mesh anyway, so nevermind…
A fixture pretty close to the classic Cibie lights (the first COTY winner to not have round headlights, something we will see more of later on). Yellow bulbs because French, lol.
Am I doing this right? Not so sure TBH. But if I could ignore the rear arches on the Rover, I just can’t on the Renault, the original shape is just too typical for the car. As you can see, lots of negatape fiddling to get rid of the arch…
The gaping hole was clad with thinned out bumper bars, set to 3D, tried to align them as well as I could to get rid of some choppiness, but sure, it is by no means smooth and flawlesss.
Then Xian’s molding pack was great to build up a new arch.
Behind the wheel I tried to combine multiple buper bars, and did my best to make it somewhat smooth. The rear pan is one single similar fixture. Looks weird but with the bumper in place it will look OK…
A whole lot of massively useful information and pictures, new mods that I clearly need to install (not too many tho), many techniques us noobs don’t even think are imaginable, a lot of precision and details… One of the most useful threads I’ve ever seen here!
Thanks, comments like this makes me think I have fulfilled the purpouse I had with this thread. It should be said, though, that I have stepped out of my comfort zone with more than one thing here…to learn more myself too.


