Crowd sourced detailing guides

The Crowd sourced detailing guide mega thread!

After thinking this over for a while with @CorsicaUnknown and @Quotex, I thought I’d make it. As a neat collection of guides made from and for the community!

Simply put, this thread is for posting your own helpful in-depth guides to detailing your own way. I’ll do my best to keep an up to date table of contents for all tutorials posted on here for it.

I’ll be adding extra detailing to this opening post if I think of anything else it could use (Suggestions welcome!)

Contents:

Front & rear facia design basics (By Quotex)

How to be modern? - Bottom front of the car (By Aaron.W)

Quotex Syndrome Detailing Checklist (By Quotex)

Modular Headlights and how you can use them… Differently (By Corsica)

Custom curved vents (By chichicoofisial)

Saving time (By yangx2)

Finding good design inspiration (By Mythrin)

Quick and easy design ideas (By CorsicaUnknown)

Hot tip: Roof rail designs (By thecarlover)

How to properly name your car (By BannedByAndroid)

Yuri’s fabulous guide to making fabulous roofless cars (By variationofvariables)

Fancy chrome door handles for modern cars (By BannedByAndroid)

Details you need to use, nice! (By CorsicaUnknown)

A smol guide on how to not use MDHL (By Dorifto_Dorito)

Deltariuns’ Quick and Easy Guide on Database Editing and Swapping Fixtures between Bodies

Corsica’s custom panel gaps

Knugcab’s HOW TO PLACE PUSHBUTTON DOOR HANDLES CORRECTLY

Crypt’s guide to…Opaque interior materials!

Marcus_gt500’s guide on NFS style interiors

Knugcab’s: A PROBABLY NOT COMPLETE GUIDE TO CAR DOOR HANDLES

MisterRocketMan’s: Around the Corner (Guide to wrap-around bumpers, lights and more.)

23 Likes

Click here if you want to see the post, I made it a long time ago, and it's rather controversial. There ARE definitely be good car designs that don't have the lineflow that's described here. I won't be deleting this. But uh, take it with a pile of salt.

NOTE: Work-in-progress (This post will be updated)

DISCLAIMER: A lot of this is aimed at beginner automationeers, there are plenty of designs that work well and don’t have a 100% flow. The kind of design you want to use varies strongly on the body shell you pick

Proportions, Placement, Period-correctness & Fixture Flow (Mid 2000s Sporty Japanese Hatchback)
In this guide, I will go over the three Ps that are very important in designing a good, realistic looking car. For this and the next few detailing guides, I will be going through the steps of creating a Mid-2000s Economy Hatchback; I will later go through these steps for designs from other time periods as well (The 1990s and 1980s specifically, as these are the eras I am most familiar with.)

STEP 1: “The Three-Element Wonder” (Front Fascia Design Basics)

When designing a car, you’ll want to start by layout out the basic major elements for your design.
First, let’s take a look at the original Suzuki Swift that the Automation body shell is based on:


You will see that the front end Consists of 3 basic elements.

  1. The headlights, a design triangular design consisting of flowy lines with a with rounded points. A very common design at the time on angular-styled cars from Japan. (For comparison, a 2005 Honda Civic, a 2005 Nissan Tiida, however it can also be a square, as seen on the 2005 Toyota Auris)
    afbeeldingafbeeldingafbeeldingafbeelding
    Also note, that for each one of these cars, the orientation of the shape is different as well.
    The swift has the flat end of the triangle on the bottom, the civic has a wedge-shaped triangle with a near 90-degree corner and the Tiida has the flat side of the triangle on top. Since the Swift has the flat side on the bottom end, I will be aiming for a similar design, but not exactly the same.

  2. The Bonnet/Hood Grille & Bumper Grille.
    afbeeldingafbeeldingafbeeldingafbeelding
    Aside from the badge, there is mostly an absence of chrome, it has a mesh insert, mesh grilles are usually considered sporty and youthful. Since the center of the Bonnet/Hood is extruded on this car, a design connecting the grille to the taillights (as seen on the Tiida) is not recommended as it will end up looking strange and works better for cars with flat bonnets/hoods. A Design like the one on the Auris would work, were it not that the Hump with the Logo on it can’t be recreated in automation (well, it can, but the logo would be flat, making it less emphasized)
    The bumper grilles usually follow either a rounded or edged rectangular look to them and chrome is (almost) never present here. Note that they usually leave enough space on the bumper to fit a full European spec license plate, if not at least the top half is mountable.

  3. The side bumper vents.
    afbeeldingafbeeldingafbeeldingafbeelding
    On the Swift, it is a separate element and a continuation of the angular, rectangular shape. It is not always a thing however, the Civic and Tiida instead have a Widened bumper grille and on the Auris the shape is contrasting to the center. The side bumper vents are usually also a mounting point for optional foglamps (on mid-to-high end trims) and are not always open, sometimes they’ll be blocked off by a plastic insert. They do almost always stay on the same height as the center bumper grille.

Now that we know the 3 major elements in the front fascia, It is time to do some concept designs. The image below contains a few examples of possible designs you could make using the Suzuki Swift Bodyshell, going from conservative designs to some more experimental one, the final one being something to avoid:


NOTE: Proportions not final.

I’ve dissected all the above designs to show you what is and isn’t fitting for the type of car we’re working with. The swift has a lot of line work that flows out to the A pillar, You should always try to work with the lines of the body shell, these are fixed elements that can’t be changed (or very little with the use of Morphs) and working with them and making everything flow nicely will result in a realistic and balanced design. There are of course always exceptions, and sometimes going in the opposite direction with fixtures will work, but most of the time it will look off somehow.

Once you’ve placed your Headlights, grilles and vents and are happy with the fixtures you’re using, it is time to move on to the next step. Do not worry too much about Proportions yet, we will go over that in a few steps.

STEP 2: “Balancing the sides” (Rear Fascia Design Basics)

An important rule when it comes to doing the Rear Fascia (Or the front if you started with the rear end of the car), is making it Consistent with the front end of the car. Let’s take a look at the rear end of the Suzuki Swift and find the Main design elements:

The rear end contains roughly as many as the front end.

  1. The Taillights
    Including 3rd brake light, which is mandatory in this era for all markets, and rear Foglight, which is mandatory if you want to make a car for the European market

If you look at the Japanese Domestic Market swift below, you will find that it does not have one, and that the bumper is shaped differently in comparison to the UK market version posted above.afbeelding

  1. The License Plate Surround

  2. The Trunk Handle

  3. The Exhaust


[TO BE CONTINUED…]

Anyways, If I decide to contribute to this thread any further, it will be in the form of How-to tutorials for detailing, rather than me attempting to yell at your from a distance because your headlights are .1nm to large.

21 Likes

Excellent thread! It must be fixed IMO

How to be modern? - Bottom front of the car.

Might as well contribute…


The modern design is very complicated. However, I can help you with that. This guide will help you to make your most bottom part of the front end of your car look modern.

Let’s use this generic car as an example. This would look like something out of 2014 or 2015. That’s fine. But it is too simple when compared to modern designs. How?! Well, the very bottom of your car is flat. Nowadays, cars have all kinds of shape on their car.

image

Take a look at this Honda civic. Look at the bottom half of the front end of the car. It has all kinds of shape. This guide will help you try to achieve a similar effect.

Step 1: A lip like this can add a little bit of shape to this generic car. It gives a sportier feel to it. However, that’s not enough.

Step 2: Making the whole bottom grille of your car black will make your car look even sportier and more modern. If you want to make a sporty model for something like 2013-2017, go ahead, use this technique, together with the lip I mentioned. The body-coloured lip creates a contrast to the car.

Step 3: Now this is better. The fact that this particular grille sticks out already gives it extra space. Make sure the lip is in the 4th layer so that it keeps its natural state without being disturbed by any other things. It already looks even more modern. However, we take things even more extreme. We want the bottom of this grille to be black. But how?

Step 4: Boom! Use this grille or any other grille that has a similar shape to this and make sure that it is one layer above the the grille of step 3. Using these combination of grilles, you can make your car look very modern. (Also, I just realise that the steps I gave you make your car look like a Mercedes Benz, lol. If you don’t want to look like that, don’t use the grille I use. Instead, experiment making new shape of grille.)

Step 5 (optional): If you want to add even more shape to your car, use one of the lips I circled in red. The first 2 inside it extended to the front, I suggest using them for sportier models. The last 2 inside the circle is like the one in the picture. It adds a tiny little more shape to your car. You can use this for normal models. For the other lips, I suggest you don’t use that. Another thing to note is make the lips black too. If you make them body-coloured, it will screw up your appearance. Don’t try.

Last but not least, always choose a modern-style wheel that supports 2 tone painting. Make the secondary paint black, or choose any wheel, but make it a dark colour.


This technique also works on car that has one massive main grille like an Audi or this one. If you put it over the massive grille, it will also make new shapes. Just experiment with the grille. Thank you!


If you have any questions, feel free to ask me.

12 Likes

Quotex Syndrome Detailing Checklist

I have compiled a Checklist of Details you could/might want to add to your vehicle build, I made this after running into the problem of not knowing what to add, so now you can have this as a guide of things to add.

If you feel like stuff is missing on the list, feel free to send me a PM (preferably Discord since I am on there more often)

13 Likes

Has this ever happened to you?

“Oh man, I’ve been stuck on this design for so long and I don’t even know what detailing I should add!
I wish that someone who has started making fairly decent designs only recently would help me with this…”

Well, kind reader, do I have a turd the post for you!

Modular Headlights and How You Can Use Them… Differently

No I’m not pretending to be a design god with this.

Workshop link too


PART 1: Taillights and Giving Them More of an 80’s Look

Many cars up until the 2000’s have featured taillights with differently shaded parts inside, making them look cooler. And guess what, you can replicate some of that with Modular Headlights (MDHL from here on)!

This is a pretty common example - a B3 model Audi 80. Notice how none of the red lights and their boxes aren’t identical with each other. For replicating this, I’ve used this fixture

Take that, and I recommend you place it in a more shallow fixture, such as a grille so you can size it and layer it before putting it behind the glass. Make the MDHL piece either metal or glass textured, depending on what kind of a texture you’re looking for, and shift+drag the piece behind the main light unit.

mddd

While not a perfect example of showing the full capabilities, you can still see which parts have been lightened up and darkened down by the MDHL light. One problem with the example given is that the taillights are just one big block. Using multiple lights helps liven it up a bit but this is an older car of mine and I don’t have any newer ones with this technique.


PART 2: Can also be used in other lights

I bet you’ve never even thought of this… right? No.

MDHL fixtures also fit inside other lights, and not just the casings that are provided. Obviously.
The example above has the hexagon lights with the invisible material changed to glass above, and three simple strips below. Again, copying the things onto the lights from inside a deep fixture is recommended.

Another example, with simple MDHL strips running across the main lighting units.


PART 3: Sidevents and Vents/Grilles in General

You see these hexagons?

If you’re willing to spend time, effort and sweat and tears in order to make your Automation cars look better, those thin light strips painted plastic can really spice up your grille. I’ve done it five times! End me!

And another picture for good measure.


PART 4: You Can Fill Stuff In With These, You Know

That right there ladies and gentlemen is a normal grille with the following MDHL piece placed inside of it.

That way, it’s just easier to make shapes like this while also saving on time. That’s not preferrable to everyone but hey, what do I care.

You can also make cool vent stuff with these.


Thanks for reading through this crap guide.

Also, enjoy these two cars if you’ve decided they’re not bad :slight_smile:

28 Likes

Everything here is essential for making more complex designs for any era (especially the 2010s) - and well worth trying out! It seems daunting at first, but is highly rewarding once you get the hang of it.

1 Like

Wow, I really never thought of the MDHL lights as lines on the car, too nice to get a new tecnhique

Welcome to my little part of this guide.
I'll make it in Comic Sans so it burns your eyes even more. This part will get updated as I discover how to do new things and people demand to know how to do them. As I like to get things very well explained to not get "is doesn t work" comments, they'll be hidden under a spoiler dropdown due to their length. Click at the one you'd like to see.

Also, you’ll need some basic knowledge of the game. You won’t see any basics of the game here.

Comic Sans is not a joke. Be advised.


Custom curved vents

In this part, we’re going to see how to make custom curved vents, useful for wheel arch vents or any other application.

In this case, we’re going to need only Chickenbiscuit’s Patchwork, and be using the UE4.24 version of the game. Below, you’ll see the steps.

So, for the custom vents I’m going to use these ones. You’ll find them under the body moulding category.

If you wanted to make a straight vent, you would just extend the one we’ve shown. The trick comes when we curve it. You’ll have to use some of them at the same “level” (1/4).

As you can see, there’s a lot of borders in between that we don’t want. We’re going to remove them with CB’s Patchwork (link above). We’ll use the cut-away variant and place it like so. It doesn’t have to go out of the vent borders, if it does we’ll end with horrible edges. These are going to be placed at level 2/4.

After placing those fixtures, we’ll end up with some red squares. We want them to be transparent, so we select each one and change its material to transparent.

So, after that step, we have the vents like before but with some voids in-between. We now have to fill them with the patchwork “slopes”. We’ll use the totally straight variant, the first one. Extend them to make them flush with the vent indent. Repeat until you fill all the voids.

After filling all the voids, we’ll paint them like the vents. In my case, it’s the body paint. Choose the one that matches the vent.

Now we’re going to make the vent mesh itself. If you placed the transparent cutoff as stated, you won’t have to make the border again. Just place another of these straight slopes and let it clip over the true mesh a bit, as seen here. It has to form these triangles, and they must end in a sharp finish. These are also placed at level 2/4.

Repeat until it’s fully covered.

Now that we’ve filled the vent voids, it’s time to change the materials. Match the vent mesh materials with the vent itself, like so.

And boom, you now have your own custom vents!

As stated above, you can use them in wheel arches for example. Hope it was useful!


And here, the result of the latest tutorial update. Thanks for reading! Custom curved vents
27 Likes

Yang’s guide on…


SAVING YOUR FUCKING TIME

An educational rant about your stupid file sizes, your trivial details and your shitty boring designs.

In other words, it’s me going through my workflow, my attitude and my design methods so you’re not that person.


Hi, I play the Automation game and make Chinese designs. I’m okay at the game I guess.

Whenever I get mentioned, people usually say things like…

“how the hell can he design an entire car in 2 hours?”

“he churns out good looking cars at sweatshop rates”

“yang can spit out a car in 20 min and be just as liked as anything i make :stuck_out_tongue:

Having experience in the game helps, but even more importantly is knowing how to manage your time, nonetheless accept that nothing in this game will be perfect and approximations are the way to go. I’m a full-time engineering student who has to study for exams which occur on a weekly basis, cook for myself, walk myself to school and back, sleep a reasonable amount of hours, the whole nine yards. I don’t have a ton of time on my hands. Despite this, I still manage to make enough time to play Automation and churn out a reasonable design in just about 3 hours. My secret is this:

Pace yourself. Take time on the most important things, cut corners when you can.

In other words…

MANAGE YOUR FUCKING TIME

You can spend days upon months upon years making a single car in Automation. You can detail it to the max by spamming bumper bars and patchwork, down to the millimetre and pixel; or you can find a more efficient method which gets the job done in 3 hours at 1/5 of the file size.


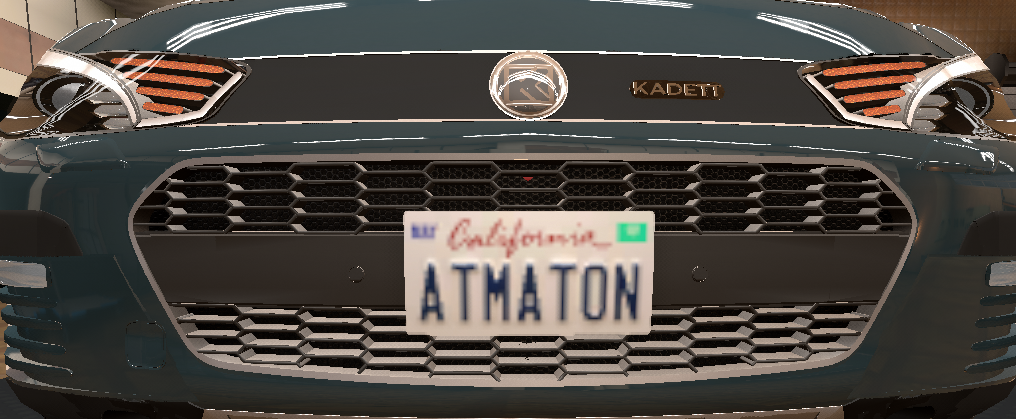
To prove my point, I decided to churn out a very mundane and mediocre Japanese luxury sedan design in 10 minutes tops.


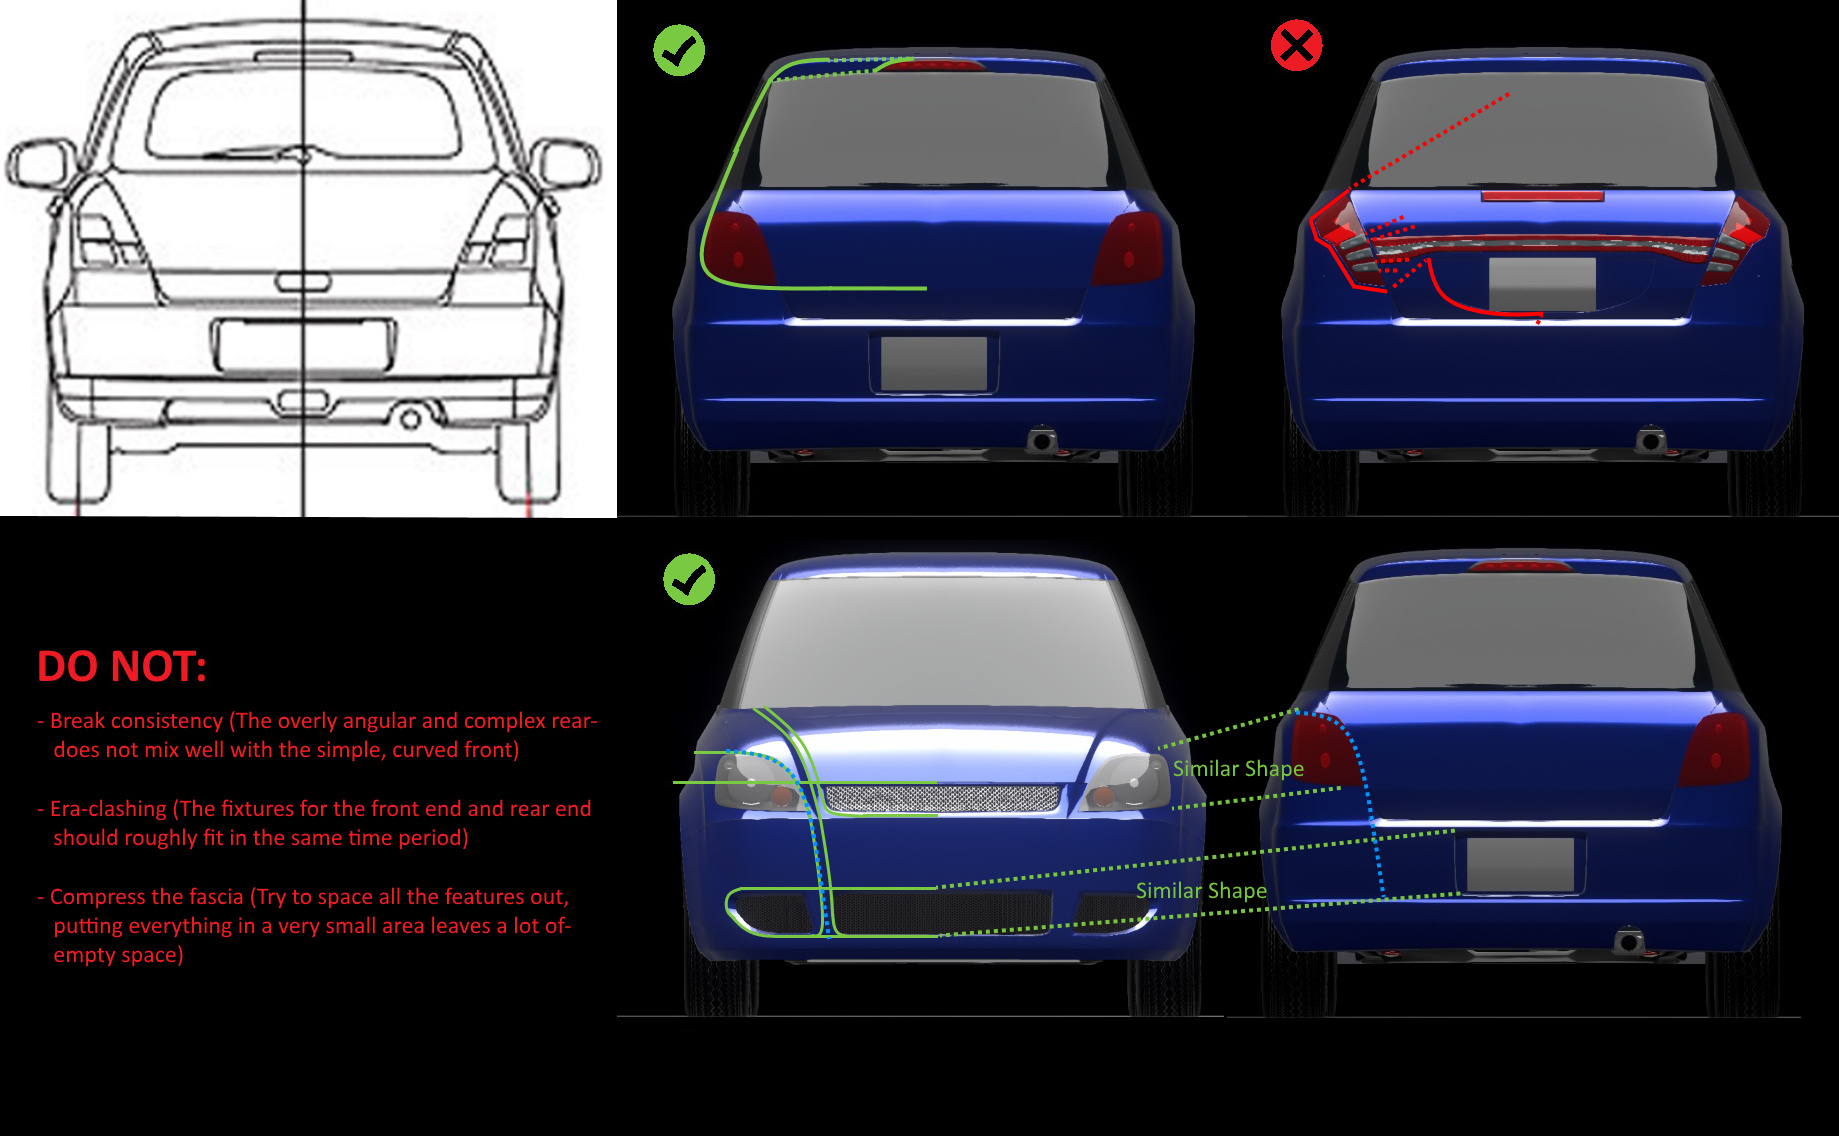
Corporate needs you to find the differences between this picture…


…and this picture.

Any significant differences? Not many. they both look like rather boring and mediocre designs which don’t really fit the quota.

However, the top design took me just about 10 minutes to do. I hastily slapped on a bunch of fixtures, ill-proportioned and called it a day. Most of it was vanilla mind you.

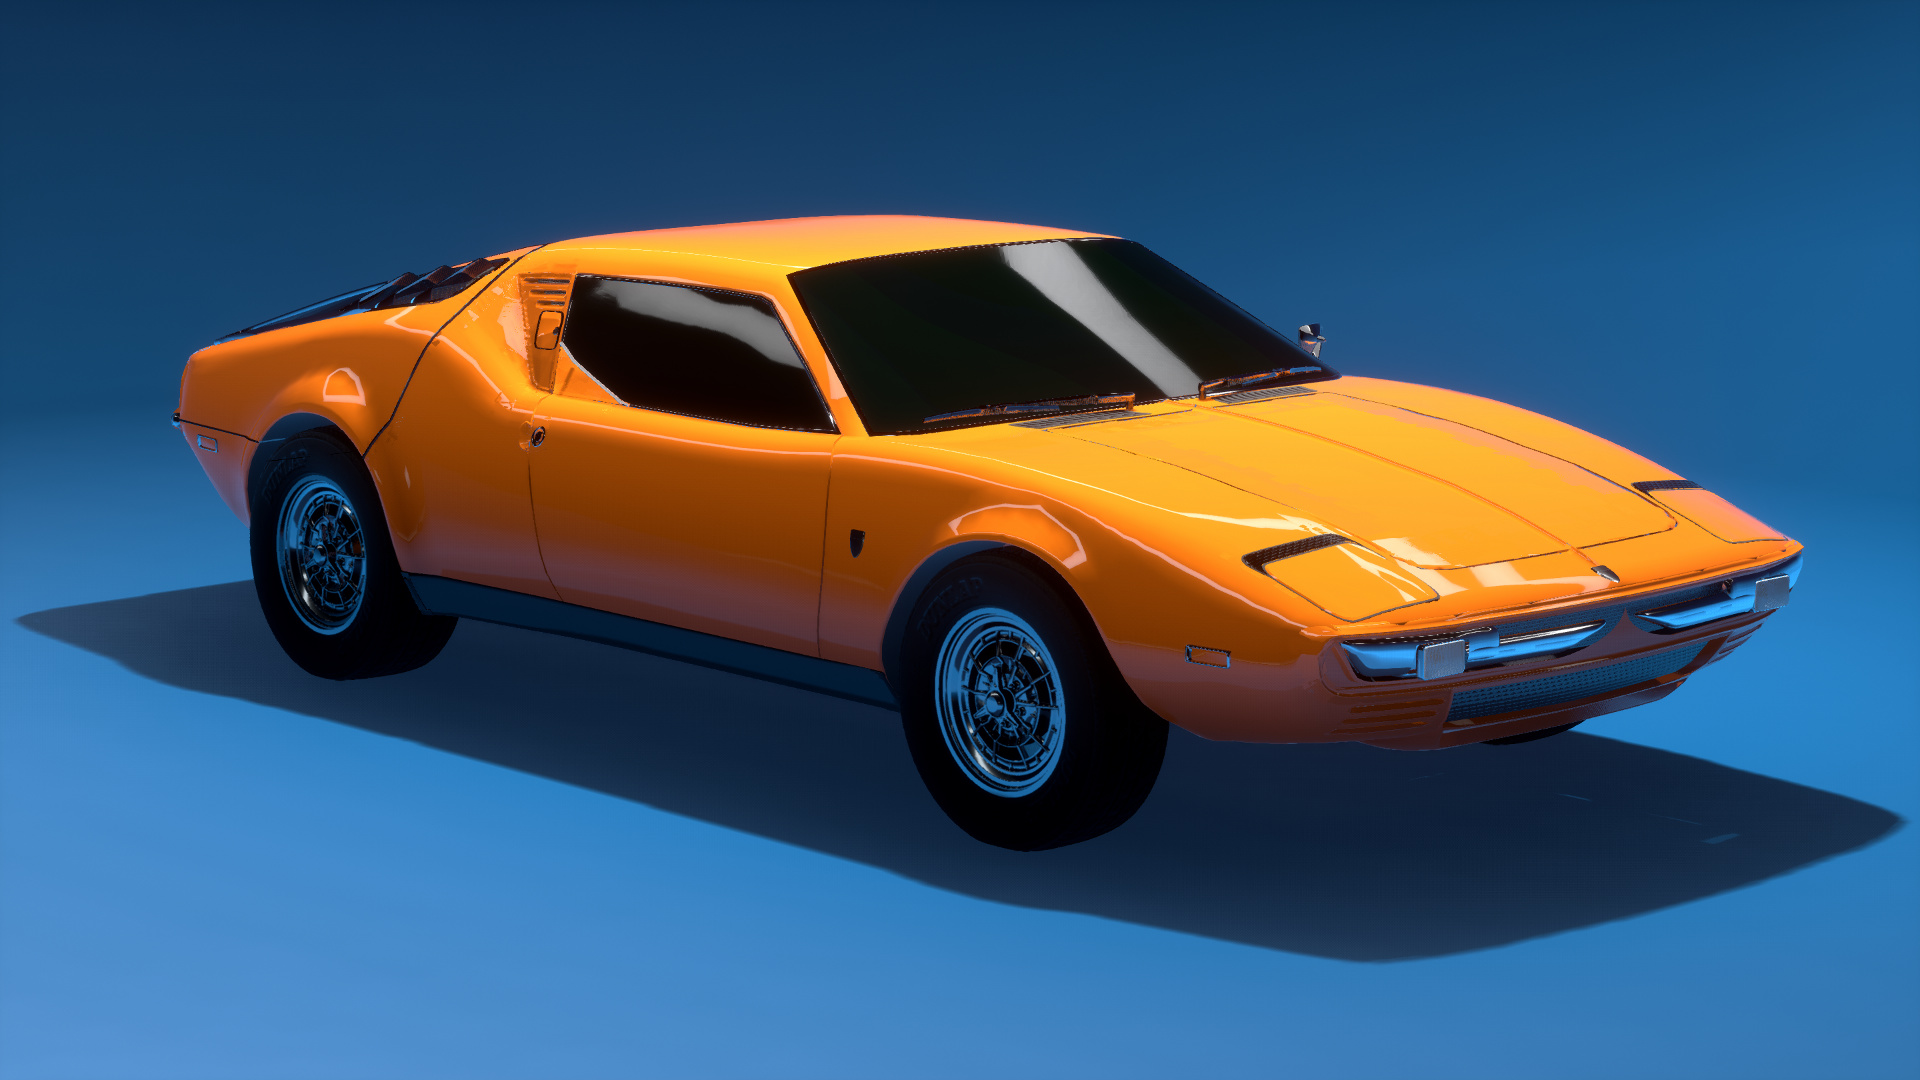
The bottom example took me just about an hour and a half. I spammed about 110 bumper bars to make a grille pattern, made some custom MDHL headlights and taillights, rear defrosters, custom third brakelight, and did a bunch of detailing in the bumper bar department.


Frankly, it looks just about the same, and you probably wouldn’t have noticed most of them if I hadn’t pointed them out.

image
image


Here are all of them close-up. Notice how these elements aren’t the things that drag your attention right away. It’s because they are all merely trivial compared to the base design of the car.


Because people loooooooove to flex their file sizes for some reason, here’s a quick comparison between the 10 minute design and the 1.5h design:

Design_Example_-_I_did_this_in_10_minutes.car (28.2 KB)

Design_Example_-_BUT_THE_DETAILS_MEN.car (131.9 KB)


There’s a significant gap between the dick sizes of these cars, but with little to no gain in aesthetics. It’s almost like you can have a gigantic dick but no one will think you are a good person because you’re a surface-level asshole.

In more straightforward terms, file sizes and trivial details don’t mean shit to your design. At all. The base design is absolutely everything and is the quickest way to make an attractive vehicle.


The Fucking Base Design

You can be making a nice Japanese luxury car with a ton of cool and RAD details, but if it started off as a mid-spec Toyota, it will always be a mid-spec fucking Toyota. So many people half-ass this part, hop straight into the i n t r i c a t e details and whine about why no one likes their designs. I don’t know, maybe it’s because you rushed your fucking design on the get-go?

Morphing and Engineering

Expand

The early stage of the base design doesn’t just involve your fixtures. It involves your morphs, your wheel size, your ride height, all your engineering. This new Lancer body spawns in with some pretty large wheels, and a very Mitsubishi-like profile.

Simply adjusting some of these parameters to your liking changes the entire car, and brings you closer to your intended design. Many people don’t mess with morphs or do them in some minmax fashion that makes the car look like a submarine. Do not sleep on your morphs. They can transform bodies into entirely different things.

Option 1: The Fixture Slapping Method (not recommended)

This is if you don't know where to start

It’s literally what it sounds like. If you don’t know where to start, slap some fixtures onto your car until something works, then branch off from there. While you’re in the process of doing this, rotate your fixtures, flip them, rescale them. See what happens! Your brain will eventually click and say “this looks good!”

image

Obviously this doesn’t look good, but you now have a general shape you can work with for your design. This is the most important step. You have to choose a good headlight and grille combo based on your idea and if you fall short here, your entire design will fall short.

Once you spend an ample amount of time working this out, you can now proportion it to your liking. Spend a lot of time on this too. Proportions are everything. Note how I switched out some materials too. Once you’re happy here, THEN you can move onto the major details.

However, this method isn’t second nature to a lot of people and usually takes a ton of time cycling through millions of combinations, which leads me to my main method.

Option 2: Copying!

The recommended method!


These few frames from Shirobako episode 8 are wonderful. I cherish them dearly as they summarize how I design my own cars when I don’t know when to start. Many will argue that it will water down your creativity, I argue that it will save you hours upon hours of time when you don’t know where to go.

Right now I am attempting to make a 2005 Japanese compact sedan. I could start fixture slapping but that will lead me to a ton of roadblocks and a lot of wasted time. Instead, I will use this amazing tool called Google! I will literally search up “2005 Japanese compact sedan”, not “2005 American sedan”, “2005 luxury car”, “2005 truck”.

Fun tip: Search it in the country’s language for more localized results.

This is where most people falter in vehicle design. They want to create a premium vehicle yet use a Toyota Camry as their reference. No, you’re not a shitty designer, their criticism isn’t stupid, you just don’t know how to design your class of car because you’re too much of an idiot to not consider SEARCHING IT UP ON FUCKING GOOGLE.

Although some stuff shouldn’t belong in there, we already have a few designs we can take elements from. The Aerio has a nice lower fascia so I can use that as a starting point and go from there.

From here, you can adjust its proportions, add more or even remove things if you want. Keep doing this for the upper fascia, headlights, and the rest of the car while putting your own spin on them and you’ll get to something good. Make sure to keep cross-checking with Google or your favourite car info site to see if you’re on the right track!

And there we have it. Copying just one grille has allowed me to pick and pull a couple things to use for the rest of the vehicle. Once you find a nice reference vehicle and take some inspiration from part of it, the rest of your design will snowball. This is how I start my design 9/10 times and is probably the reason why I finish my designs so quickly. This method works even better when you already have some existing designs from your company, as you can modify and propagate their looks across the entire lineup.

Of course, don’t copy your reference cars verbatim. You’re not really benefitting from doing that either as your base design will end up generic, soulless and WILL be compared to its real-life equivalent ad nauseam.

This should be where most of your design’s time is spent on, not the fucking details. It comes from the long time saying of polishing a turd. If your car’s design looks like something that can be done by anyone in 5 minutes, hell, even an unintended 1:1 replica, that’s not going to help either.

Individuality in base design is how the best of the best became the best of the best. It’s how people like ProfessorP3PP3R, titleguy1, mat1476, On3CherryShake, CorsicaUnknown and many others rose to their stardom.

If you can spend a good chunk of time making a good base design that isn’t generic, or a direct replica of a real-life car, you’re already one step towards the top.


The Fucking Details

Spend the least amount of time on this. Don’t get me wrong, details are cool. If done correctly, they make a car look wonderful. If done incorrectly, your car will either look like the face of a middle schooler who just discovered makeup or a steaming pile of generic garbage that could have been done in 1/10th of the time.

Obviously there are a ton of things that will result in tedious work, but when there is a shortcut, I will 100% take it. These are super obvious ones but I apparently have to spell it out because file sizes are the ever-triumphant king to some.

Bumper Bars

Holy shit writing that header is already giving me an aneurysm

HOLY FUCKING SHIT people looOOOOOVE to flex the fact that they can spend 3 days without food or sleep spamming bumper bars on their car, just for it to look like something you can do with two pieces. Your dog may have died but mmmmm yes my sweet NUT REACTS!

image

I’ve seen people literally wrap 7 pieces of bumper bar around a bumper like this. Honestly…

what the fuck are you doing

image

This on the other hand, is two long pieces. It literally looks the fucking same. Why do people flex this. All you do is make us let out a big long sigh at the fact that you wasted 3 hours of time on something that could have been done in 30 seconds.

Same for side trim. Just slap your fucking bumper bar on there bud!

From far away, the difference is negligible from precisely aligning it to the millimetre. Unless you’re that
person who criticizes people’s designs because one piece of trim is 2 microns off from the JDM spec Mitsubishi Galant ultra Japanese Kaminari Edition Girls Und Panzer special (mostly because your design is shit and you have to find a way to flex your s i c k d e t a i l s), no one will notice a thing. I’ve let plenty of these flaws pass in my final designs and no one batted an eye.

Most of the time too, you don’t have to outline things in bumper bars, or Gizmo’s shaping kit if you’re on stable. Open Beta has some incredible molding fixtures that completely transform how things look. Just find the least tedious (and most feasible) path instead of going with the most tedious. This is also why my ever-so-glorified
file sizes are tiny. Because I take shortcuts. Bumper bars are nice but they’re not a one-size-fits-all weapon. Spamming them on your car will not make it pretty. Spamming them in your pork will not make it taste good. Spamming them in your toilet will not unclog it.

Grilles

Easy one

Not going to go in-depth with this.

image

Why the FUCK would I spend ages doing something like this?

image

When I can just click one fixture and do this?

Obviously this doesn’t apply to modern grilles as those get insanely complicated and require a ton of tedious work. But for very generic patterns? HELLO?


The Fucking Attitude

You see, I have no problem with people who hyperdetail their cars. It can be cool at times, it’s your life, do what you want with it. If you’re not efficient, that’s fine. That’s why you’re reading this, to be a better designer without investing an entire year into a car.

HOWEVER, when all you do either here or on the Discord is derail ongoing conversations, get cocky, or look down on people from your fake ivory tower because you’re better than them at enlarging your file sizes and putting trivial details on your boring cars, know that I say this from the bottom of my heart…

…you’re equal parts a shitty designer and an even shittier person.

If you’re a stuck-up dickwad, no one will like your designs in the first place and none of this guide will even matter. Being rude to others, whether in the form of one-upping, flexing, or just being insufferable on a day-to-day basis is a good way to make people have a hard time liking your designs. This is the same debacle that Chris Brown, XXXTentacion, Carnage and many other artists suffer from today. Hell, some people in the Automation community suffer from it too.


Concluding Remarks

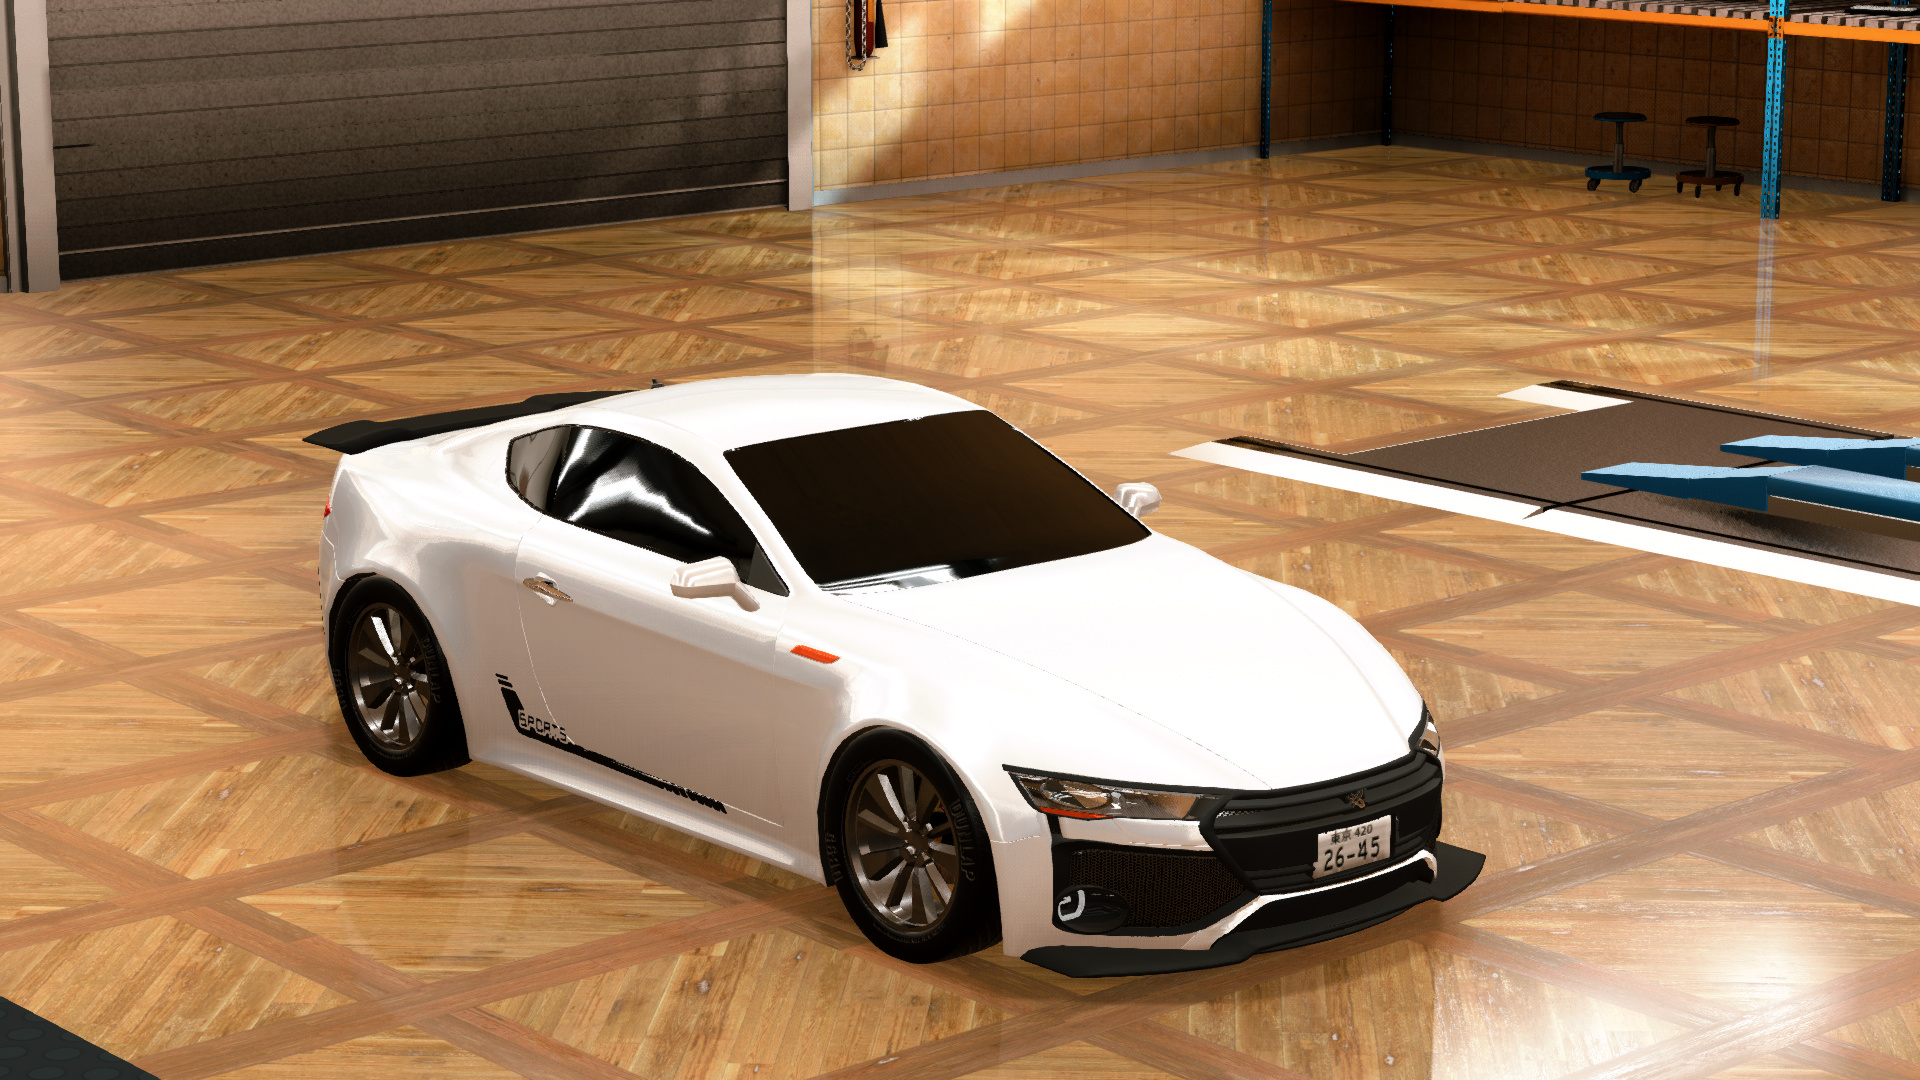
With all these given, I was able to turn this awful Japanese luxury sedan…

…into this.

All it took was a few modifications to the base design’s proportions, some body height modifications via. some incredibly lazy bumper barring, and material swaps. No trivial details, only necessary ones. No forcing some tedious work when there was an easier path available, everything is a-ok. You can zoom right up to the vehicle and find a bunch of little defects, but from afar it is miles better looking than the hyperdetailed version I spent forever making everything intricate on. The most work I did here was toss on a few grille inserts to give it some texture, but that’s about it.

And of course, because I have to spell it out to everyone, the file size is incredibly small, while looking miles better too.

Design_Example_-_New_and_improved.car (45.7 KB)

Best of all, it doesn’t lag in photoscenes and doesn’t blow up in a million pieces from a little tap in BeamNG!


Of course, there are some other smaller tips I can give. If you are REALLY stuck, take a break and come back later. If you are feeling hopeless like you can’t make good designs anymore, that’s okay too! We have our off-days. Not everyone can churn out a design in 3 hours tops, and it’s fine if that’s not your thing. If you want to spend forever on a design, that’s fine too! If you want to be quicker, this guide shares some of my tips, albeit being incredibly obvious and generic.

The most important tip I can give is this:

Don’t be a dick. Don’t be a cocky idiot who thinks you have some god-given gift at designing, and can sit on a fake throne and judge people from above, yet throw a fit once someone criticizes you. No one’s designs are perfect, there is no best designer, there is only a favourite designer, and that favourite designer is an opinion exclusive to you.

Be nice to others, help people out. We are in the Automation community not to become the best designer, not to degrade others for having worse cars than us, but because we share a unified passion of loving cars, their design, their engineering, their everything.

So quit the flexing, cut it with the one-upping. We all have potential, and the first step to unlocking it is to be the person you want to talk to, and see as a role model in our day-to-day lives.

Some relevant quotes

image

image

image

image

image

image

image

image

image

image

56 Likes

Finding Good Design Inspiration

The guide to finding appropriate and replicatable design inspiration and help to make realistic designs.


Preface: This is an expansion on a point in Yangs post above about how to use inspiration vehicles effectively. I by far do not consider myself the best designer on the forum, but I would say I am pretty decent and this post is only meant to explain how these steps helped me improve. This guide is not an end game design recipe but should help you establish some design rules and proportion fixtures effectively to then expand your design on to.


Part 0: What do you want to achieve?

The most realistic Automation designs look as such to the point you could see them in real life, take for example MGR’s Elwood Iroquois, or RK38’s Sachiuri Sagitta. These cars have taken inspiration from real life examples and then fused them with their own design language. Creating a unique design but not with Mitsuoka Orochi levels of standing out were they to be in the real world.

An important fact to note with your own design ideas is that if it has not been done on a car before in some way, it likely does not work. You do not need to try and reinvent the wheel.

Take this tailight arrangement for example, I thought “hey that’s unique, nobody has done that before on a luxury SUV, I’ll put it on my car” but taking a step back and listening to another opinion, I realised why that design has never been done before … because it looks like arse.


The point I am making is that by taking things from reality you can create an affective design basis to which you can add alterations. But still have your own idea in your head as to what you want to go for.


Part 1: Choosing your inspiration.

The most important and maybe obvious piece of advice in choosing your inspiration is to use cars that are a similar shape to the vehicle body you are using, there’s no point in using a Range Rover as a starting point for an supermini, they just do not match up.

Take this 1970 supercar, though the Lamborghini Miura was the iconic supercar, it’s iconic front end cannot be effectively placed onto this body, you can see by just looking at the starting body’s formation. So what to do, find vehicles that A: Use the exact body you want to use, and/or, B: find ones similar to create the bulk of the starting design. Your inspiration must be befitting to the body you want to use.

Details however can come from different models as the tailights and under door trim of this model are similar to that of a Miura P400.


You can see clearly this inspiration vehicles share definite qualities with the body I used and so the design aspects taken can be placed effectively.

Inspiration Vehicles for 70's Supercar


Part 2: Using your inspiration without copying.

The easiest way to not look like you’re simply making a replica is to use a lot of different aspects from a lot of different cars.

Take for example this current day hatchback :

I would say that I cannot pinpoint what real world example this car exactly looks like, this is because I used a large amount of different aspects from different cars and mesh them all together.

Another obvious point is to know which nation your car is going to be from, this being a French vehicle I naturally used a lot of French inspiration and then built upon it to make it more to my tastes.

Inspiration vehicles for modern day hatchback

Intitial grille design

The rolled over front of bonnet look

Bottom air vents

Initial tailight design

Extra: Full length bonnet trapezoid from this became part of my company’s design language

Linking to Yangs previous post, using inspiration that has it’s fixtures already in the game can come as a huge time saving benefit, EG: The Meganes fascia vents and Corolla grille are already similarly modeled in game so I needed not craft my own fixture and therefore saved a large amount of time. So choose inspo that could be easily replicated in game to start with.

You can use other guides in this thread to aid with tweaking existing designs and so create a more unique design.


My final point is that just using appropriate irl cars to design from can really give a boost to your design realism and that by doing this for many cars you begin to understand how to proportion and place fixtures properly, and learn more about era appropriate features and shapes, so long as you use appropriate inspo.

Basically replicating, copying whatever you want to call it call it provides a solid start to a design and if nothing was copied in the first place cars wouldn’t have 4 wheels, so you aren’t cheating or being a bad designer by using other designs to help.

A strange way that I look at a finished design is “does it look like a GTAV car”, in that does it look inspired by an irl car using a real life body but not totally copying, think Karin Sultan vs Subaru Impreza/IS300, they have the same vibe but are not total copies or eachother.


Thanks for taking it out of your time to read that, hopefully it can help someone!

26 Likes

I’ve got nothing better to do.

Quick and Easy Design Ideas
or How to Ignore Everything Said by Yang.


INSET LIGHTS AND WHATNOT

You see that indicator and how the light itself doesn’t sit flush with the bumper? While sealed memes can be used to function similarly, they’re too square in design for some cars and as such, here’s a more complicated way of doing things.

image

Here’s the basic idea behind it: an MDHL projector light is placed inside a vent with the sides of the vent covering up the edges of the light. That’s it.


MDHL AND GRADIENT LIGHTS

The only design I’ve ever been remotely proud of. You see the gradient effect near the reversing lights? Simply use the MDHL piece below and play around with materials to get the look.

image

Here’s what it looks like in design mode, without the red glass on top.


A PANEL GAP BETWEEN THE LIGHTS/GRILLE AND BODYWORK

Here’s the overdone front of a pickup. Notice the black bars between the grille and bodywork? That’s supposed to resemble a panel gap and also it looks cool. As Gizmos body shaping kit is dead, the best course of action would most likely be to use good ol’ bumper bars for this.

image

And another pic with the gap in place because I like this sedan too much and just want a reason to repost it.


IF YOUR EXHAUST IS ATTACHED WITH TAPE FROM THE FACTORY…

Courtesy of @Lava_Cake and whoever he stole it from.

image

If you want to stick some fixtures in a place where no one will ever look, you can place these things under the Misc. category over the exhaust.

image

Looks cool, that’s all.


MODERN LICENCE PLATE INDENTS

If the new stock fixtures aren’t good enough or if you want a little more variety, stick some of CB’s Patchwork in a grille and call it a day.

Good luck with fitting a licence plate in there without it sticking out too much though.


That’s it for now, did you learn anything new or interesting? Be sure to @ me and tell me how much you don’t care for any of these.

32 Likes

Simple hot tip of the day: use door handles for more flush and versatile roof rail designs.

25 Likes

bxDroid’s Guide on How To Properly Name Your Fucking Car

(Alternate Title: bxDroid’s Ranting About Shitty Car Names On This Site)

Yeah, I know this might not be the place for this but a good car name matters too. If anyone isn’t happy with this post on a possibly wrong place then I’ll delete it and move it to a dedicated post instead.

Ahem. Back to the topic. Well, it’s probably just me, but I just hate how some people name their cars like somebody got a stroke and went all-out with some shitty naming scheme that made up by like, 5 seconds. Yeah, there’s no way a bad name can match with an excellent design, and if that happens, it’s very, very problematic that will lead it into a joke on the forums and Discord that you don’t want to see.

But yeah, I know, I know. Somebody may just want to name their cars anything, fine, I don’t really care much. But if you actually want to have a shitty guide about fixing your car name, here’s the shitty guide on how to properly name your car so you don’t have a shitty car name attached to your Automation career anymore.

AUTOS%20OPENER%20NAMES

Car names and trim names

Pt. 1: Car names

In the car world there are 2 major ways of naming car names, i.e. the alphanumerical method, or the “real word” method. The method you choose depends on what you want, but most of the time, most European and luxury-oriented (and some sport-oriented) vehicles use the alphanumerical method, while most budget-oriented makes, as well as most Asian and American makes typically use the “real word” method.

The Alphanumerical Way

Basically the easiest way on naming cars, as you just only need to think a string of letters and numbers and jumble them up into a string as names. (eg. C-Class, 3 Series, XJ, NSX…), Most of the time, the words don’t have a specific meaning but there are some cases the words may have meanings embedded in it. For example, Aston Martin’s DB series of vehicles actually was named after David Brown, an English businessman who bought Aston Martin in 1947 and Lagonda in 1948.

The “Real Word” Way

The “real word” way is basically using real words from a dictionary, names of anything or sometimes creating a whole new word for a car. (eg. Civic, Camaro, Skyline, Phantom…) Most of the time only one word is used, but there are cases where 2 words or more are used (eg. Crown Victoria, Gran Turismo…)

Often, these are the common ways where “real words” is used on cars:

  • Names of people
  • Places
  • Animals
  • Plants
  • Mythical beasts
  • Activities
  • Maybe something else…

Sometimes, there’s also some outliers that have a mix of two methods of naming, or simply just blurred the line between these two methods, eg. 458 Italia, Model S, Type 1, GT, etc.

But no matter how do you name your car, there’s some small guidelines on proper car naming:

  1. Be consistent. If using a alphanumeric naming scheme, try using a string of words that are consistent to the rest of your lineup. If using a “real word” try use a specific theme to make anything consistent. (Look for Volkswagen’s wind-based naming scheme on some cars or Toyota’s variants of “crown” naming scheme as an example)
  2. If using an alphanumeric scheme, try to use a string of words that is short, concise and have a method of naming so you won’t name a car like a fucking mess.
  3. If you have a “real” name for a car, use a name that gives the owner positive annotation and thinking. Nobody wants to buy a car or look for a car in a thread that is named “Idiot” or “Horrible”.
  4. Proper placement and logic matters on a car name as well. No one is going to believe you when your luxury sedan is called “Baja” for some reason anyway.

Pt. 2: Trim names

The trim name determines what the specific trim of car should be, whether it’s the base model or the top-spec model. A proper trim naming scheme can make people easily which models are the base and which are on the top.

Really there are several ways to make a trim name for a car, either it’s numbers, words, letters, both of either choice or all three of them. It depends on how you name your trims. But be sure to follow this things:

  1. The larger the number is usually the better version of a car.
  2. Use concise naming schemes. There is no way anyone wants a car with a trim name like “3.0 V6 Turbo Super Sport GT RS 3000SE” (Unless it’s a special edition model, but depends on anything I guess.)
  3. Hierarchy matters. It’s pretty hard to explain with words, honestly. But try to check how the trims work on each car IRL to give an idea on how to name your trims.

Car Branding

A brand is just the identifier of a company, but for a buyer it evokes some meaning before they buy anything. People associates brands with their own qualities. For example, when anyone mentions Toyota, the first thing (for most people at least) associates with dependable, durable, sometimes boring motors. A good brand will make positive connections with the person who is connecting with it.

Pt. 1: Brand names

Basically, before you name your brand, there’s 2 things in mind: Nationality and Segment. You need a company name that is working for your country the company that is made of and reflects the company’s target market.

The easiest way is to create the company based on surnames of people of the country your car maker is from (Ford, Toyota, Lamborghini are some examples.) A quick and handy way to do is to search on Google/Bing/DuckDuckGo with the search term “(people from a certain country) surnames”.

If you have a company name that is too long, try using an acronym of the company’s full name. It isn’t a good idea to say the whole “Bayerische Motoren Werke” when BMW works really well (most of the time).

Otherwise, refer to the sections above for more naming ideas, since most of the time they works the same.

Pt.2: Logos

You have your brand name set…now you just need a logo for your car. But how? Here’s some small tips on how to create a good logo.

A brand logo must be:

  • Recognizable. The logo must be somewhat related to your car. If you see a car with the 3-pointed star on a circle on the front of the car normally people will know it’s probably a Mercedes-Benz*,
  • Clear. The logo on the car should be correctly placed and be visible (in most cases).
  • Reflects with your company ideals: The logo should reflect to what the company should be.

* unless it’s a fake one

Placement

Now, you got your names ready and your badges fitted, how do you put your logos and other stuff on your creation then? For the sake of showing people on how badges are fitted, here’s a generic late 2000s - early 2010s hot hatch as an example for how logos typically locate:

(Disclaimer: Treat this pictures as a suggestion, not a guide. You may put your shit like whatever you want but don’t overdo it.)

Some small notes for badge placements:

  1. Size matter. Too large and it would be very obnoxious. Too small and nobody will know what the hell is that.
  2. Less is more. Don’t put too much badges on your car. Two logo badges, one on the front and back with a model/trim badge on the rear is enough for most cases.

So, here marks the end of my (shitty) guide on how to fucking name your car right. Really, now you know how to name your cars well. With this guide, you can stop naming cars like shit and putting badges everywhere.

And before I end this guide, here’s a gift from me, which is that hot hatch I mentioned on the guide as the badging example:

G2_-_150T_GTi-R.car (35.1 KB) (For UE4.24 only)

Droid’s out. mic drop

23 Likes

Yuri's fabulous guide to making fabulous roofless cars!

wow pastel uwu so kawaii

Hi there, it’s me Yuri, this will be a (hopefully) not-too-long but (hopefully) not-too-rudimentary guide on how to make roofless/topless cars in Automation.

So you’re here for one of a few reasons probably.
There’s some ongoing convertible challenge and you want to dethrone that one good-looking car made by someone else, or you’ve seen a Quezon roadster and you’ve suddenly somehow drained half your entire sack at it, or you just want to make a good looking roofless car.

Well whatever your reason is, I don’t give a fuck!
You want that good looking convertible? You’re gonna have to earn it.
Pour your blood, sweat, tears, cum, whatever bodily flui-

Okay yeah my sense of humour is nonexistent. Sorry, let’s get on with it.
please fucking save me its almost 2am

Designing a convertible is much more simple than most people think it is.
I could probably split it up into the following:

  • Planning Phase

  • Chopping Phase

  • Interior design Phase

  • Finalizing

This is the order that I like doing things, and its the order a lot of other people probably do it as well. And so with that out of the way, let us begin!


Planning Phase


Like literally everything else, you’re going to have to plan ahead in order to get the best result. this is especially true for when you’re about to have a child, not that i can relate.
Now in this planning phase, I’d usually have a car that’s ready to chop the roof off and turn into a fully-fledged targa/t-top/converible.
If you don’t then ǧ̵͙̜̕e̶͎͌t̴̬̽̌ ̴͇̱̒t̸̖͝ọ̸̄̓ ̴͙͇͗f̴̹͈͝ů̵͔͛͜c̵͔̊k̶̤̎̊í̵̼n̸̠͈͊g̷̡̀̀ ̵̩̂̈́ẃ̸̡͝o̶̳̞͂̋r̵͈̓k̸̮̆͐.

…That aside, you’re first going to have to decide on whether or not your car is to be a targa/t-top or a convertible.
Targa tops are recommended for cars with sloping roofs, such as that of kammbacks or fastbacks, as they allow the car to maintain a smooth and sleek ??? design while still being able to pop the roof off.
Normal convertibles are more or less decided by the body you’re using. But if for whatever reason the body you’re using has no convertible variant, then usually cars that have normal convertible variants are those without sloping sleek roofs and instead have a regular old decklid.
Makes sense? Okay, good.

Now that you’ve decided on a car, you’ll need some mods for this.
The mods in question are Negatape by Gizmo_Props, Patchwork by Chickenbiscuit, and Interior Pack by Simmer22
Installed? Alright, lets get on with it then.


Chopping Phase


So the differences for chopping off roofs of cars through the years aren’t really very different. It all follows a workflow that you can bend to your preference.

Let’s start with normal convertibles. I’ll be doing it with this little guinea pig AKA a 2006 Quezon Cordova.
If you paid attention, you will notice that this car would make much more sense as a normal convertible than a targa because of its roofline.

So let’s begin.

First of all, we’re privileged enough to have a choice between one of two modes of deletion. Patchwork and Negatape.

For this tutorial, I’ll be using Patchwork (on the left) as it is easier to visualize and already comes mirrored.

We’ll start by placing the square “Cut away” fixture onto the car, and stretching it to cover the lower part of the window.

We’re gonna hit Shift while dragging that bit of patchwork to clone it and cover the rest of the lower roof.

Next, we’ll use the circular “Cut away” fixture to cover the edges.

Continuing onto the edges, we can shrink the square "Cut away"s to more precisely cover up as much as we can. It is okay to leave some regular window edges as they will likely not be visible in the final product.

For the roof, ensure all extra unnecessary details are removed before proceeding.

Once the roof has been cleared, return to the square “Cut away” fixture and stretch it to reach the other bits of patchwork you have added onto the sides of the roof of the vehicle.

We will again be using the circular “Cut away” fixture to smoothen out the edges.

Be sure to check for any extra imperfections that might need sorting out!
Once you have done so, make all the “Cut away” fixtures materials to transparent and bring them forward by about one layer.
An easy way to cycle through these is to use the “,” and “.” keys!

And we’re done!

Just kidding, no we’re fucking not.

To remove the windshield, we can use all the same techniques for the rest of the roof, using the square and circular "Cut away"s and setting the materials to transparent when finished.

Final step is to take the “Patch” fixture from Patchwork and to stretch it so it covers the entirety of the front windshield. If you were a good boy/girl and you properly followed my instructions carefully, the Patch will naturally fall below the roof cutouts making a clean windshield.

Oh, and make sure to set the material to glass!


Interior Design Phase


Now this is the part where the Interior Pack by Simmer22 really comes into play. Do note that this interior pack is not guaranteed to work for all bodies, as that is simply a limit of the mod and the game.
Interior fixtures are found in the Miscellaneous or Misc section.

We’ll start with adding a dashboard. You can pick any of these depending on the era of the car.

Select this red stick fixture to begin placing your dashboard.

You can move the red stick around and switch back and forth between that and the dashboard you picked for fine-tuning. There are multiple depths for all dashboards, so you can find one that will suit the car you’re making.

Next we can move onto the seats, the process is the same. Just pick the yellow dot first to approximate the location and where you will be placing them. You can also resize the seats and dashboard in order to change their heights. The process is identical for backseats.
Be sure to mirror your seats!

The process is the same for steering wheels and whatever that thing is in the back.

Now for interior panels. If you select this square gray fixture, you can add interior paneling that is more or less the same for adding other interior pieces.

You can also use this steel pipe thing also in Misc. You can change its material, stretch it and use it to add more depth to the interior of the car and to make sunvisors.

Oh, and don’t forget your rear view mirror!

And we’re pretty much done! It’s up to you if you’d like to detail it more!


Finalizing Phase


Now to add the extra nitty gritty details that add just a little bit of extra depth.
Bumperbars are your friend here when adding in some extra tidbits such as an outline around the roof (for
both modern cars and older cars) or whatever that thing is on the right (mostly for older cars).

And with that, we’re pretty much done! That’s how you make a normal convertible roof car in Automation!

Finished Product

uwu more pastel

I’ll be leaving the .car file here for people to look at.
Cordova_-_2_2_6MT_Convertible.car


Targas and T-tops

wow more pastel uwu more kawaii

So the difference between a convertible and targa/t-tops are the fact that in contrast to a full convertible, a targa/t-top only has 1 or 2 panels that remove from the roof of the car, versus a full convertible which has the entire roof that can be removed.

And so the difference between making them isn’t really much, which means i don’t have to use the entire process above to show how its done.

So here’s a quick guide for targas/t-tops!


We’ll just use this car because its the only thing i have with a sloping roof.

If you were a good boy/girl earlier and you listened carefully to my instructions, then this should be a walk in the park. Just cut out the windows like normal.

Now using this fixture (also a part of patchwork), you can make an outline of your targa roof/t-bar.

And all the same steps as with the regular convertible will be followed. Once you’ve done that, well, there you go I guess.


Hope this helped people!

Will I make more of this? maybe idk bye have fun making convertibles If there are any questions feel free to PM me here or ping me on the Discord server (@Lily#8831)
33 Likes

You absolute MVP! Thank you so much for lightening my burden :smile:
Such a nice guide too

3 Likes

Well thank you very much for the guide yuri. I think I learned some more even though I did this already two times :stuck_out_tongue: .
But excellent job. Hopefully more people read it. Also I imported your first car you show an it is quite impressive for what it is. Is there any possible way to add roll over bars though?

1 Like

Read through this and recognized a whole 1 name mentioned. I take it most of the OG’s have left?

In any case, what’s with the file size bragging? Anyone care to explain this to me?

1 Like

What are you on, literally every single name in here is a massive deal, Corsica, Quotex, Yang, VMO, BBA.

To explain file size:
It don’t matter LMAO
the “idea” is that the bigger it is the more detail there must be, although this isn’t always true there is a correlation (obviously). But it can also just relate to fixture spam.

5 Likes

its saying that your car with 300kb is better than a car with 60kb or whatever